The Image Works Guide to fitting Motorcycle Stickers
Welcome to the "how to fit decals like a pro" page. The idea here is to show you some of the basic methods, tools and techniques we use and recommend, and also to dispel some of the myths about sticker fitting. While there is no magic way to fit stickers without bubbles there are a few methods you can use to reduce the number to almost nil, and when you get bubbles there are good ways and bad ways to get rid of them (more on this later)
There are a lot of "my mate says you do this......" or "I heard that if you do that....." stories told, most of which simply don't work. Having said that, there are hundreds of ways to do it, all I will show here are the ones we use. If you do it a different way and it works for you, great.
We do not supply fitting instructions with our sticker kits as many people have their own methods. Also one decal might need fitted in a completely different way on two different bikes. If you would like any advice about fitting your stickers, give us a call before you start, we will gladly talk you through it.
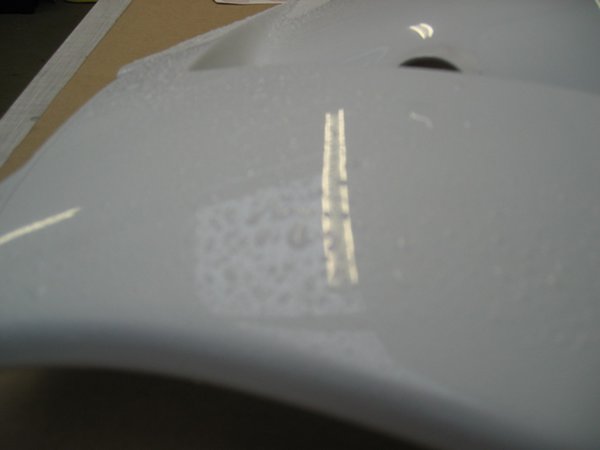
If fitting motorcycle stickers to new paintwork, we strongly recommend you allow at least 12 hours for the paint to dry before fitting. Even if the paint has been baked or feels "touch dry" there can be solvents trapped below the surface that will take time to migrate to the surface. If this occurs after you have fitted the decals it will blister them from behind causing hundreds of tiny bubbles which CANNOT BE REMOVED.
If you intend to lacquer over our motorcycle decals do not use any abrasives like Scotchbright pads etc. to key the surface of the decal, this will damage the printing. Do not use panel wipes that contain toluene as again, this will damage the printing. When applying the lacquer start off with a "dry coat" to seal the decals in, then build up the lacquer slowly, if you pile on heavy coats of lacquer too quickly you risk the solvents melting the vinyl .(this also applies when using OEM Motorcycle stickers)
Do a "dry run" first to plan out how the decal fits
Decide which method will work best before you start
Make sure you have all your tools to hand
Take your time
If in doubt, ask before your start. Advice is free, replacement motorcycle stickers cost money.
I will try to show a few methods for fitting a range of decals, from small individual stickers, to large "trim to fit" vinyls. Dry methods and wet methods. There are other methods that work just as well as these, but this is the way we do it.
Click the links below to:-
Specific kit guides
|
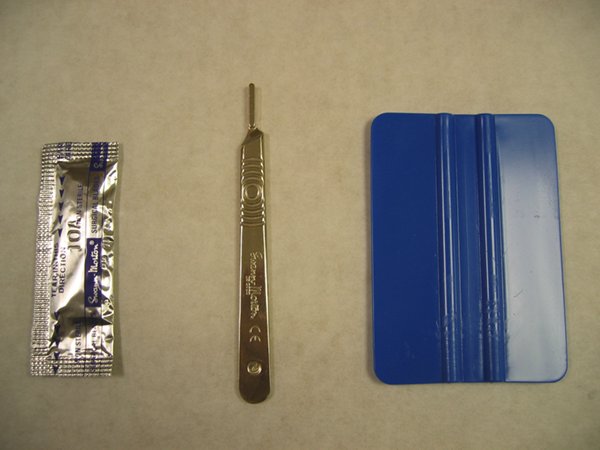
Swann-Morton scalpel or craft knife Number 10a or 11 blades 3M Blue Flexible squeegee (a filler spreader or old credit card will suffice ) |
Garden sprayer. Filled with water and 2 drops of washing up liquid
|
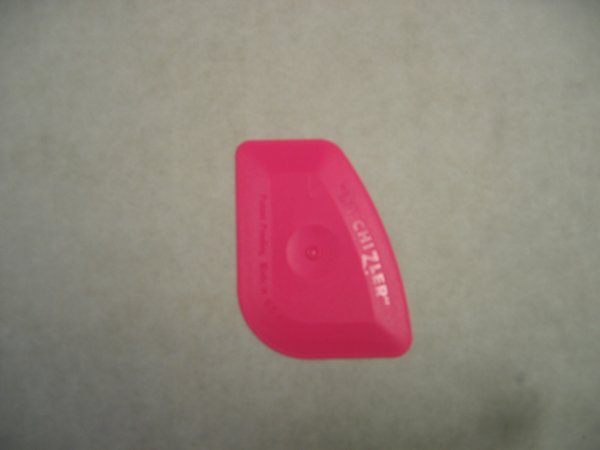
The "Little Chizler" Basically a cheaper version of the 3M Blue Flexible squeegee. But good for getting in to awkward places like air vents.
|
These are the basic tools you will need to do the job properly, all are available to buy from The Image Works, but most of them can be picked up at you local craft shop or motor factor.
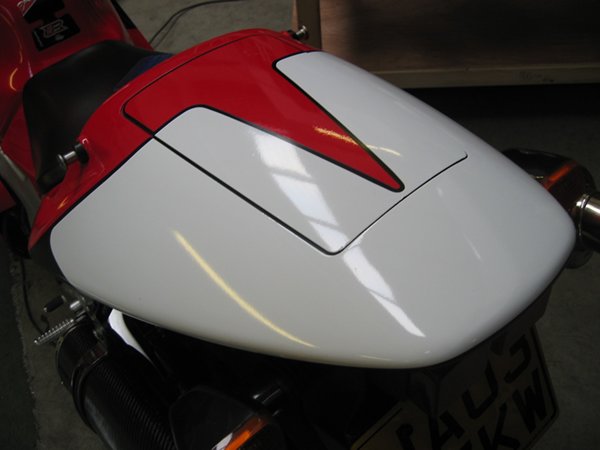
The following "lesson" will show a good method for fitting decals that are pre-cut to the shape of the panel, the example shown is for the RSV Mille fairing side, but obviously the methods used will work for any similar decal. Before fitting any sticker, the panel must be perfectly clean and wax free. Any dust will show up as a pimple in the sticker which cannot be removed, as will any scratched paintwork. Much better to flat out any imperfections or scratches with a fine abrasive paper before you start.

|
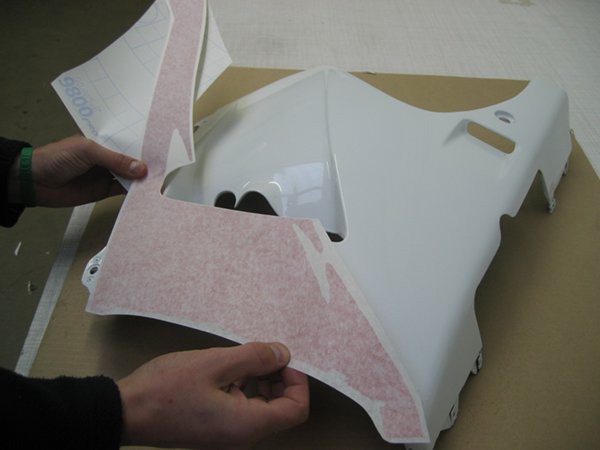
Before you start, trim the backing paper close to the edge of the decal, then offer the decal up to the panel and spend a moment to "get you head round it", look how it fits and make a mental note of the gaps at the edges and around vents etc. It's much easier to plan your fitting now than to change your mind half way through. It's often better to start in the middle if the panel has a pronounced curve, this will enable you to spread the excess vinyl around the whole edge of the decal rather than arrive at the end with a large ripple of vinyl and nowhere to fit it. However in this example the panel is reasonably flat so we are going to start fitting from the top. |
 |
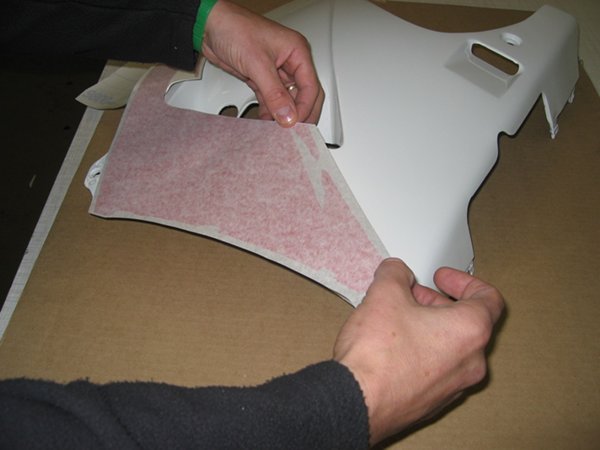
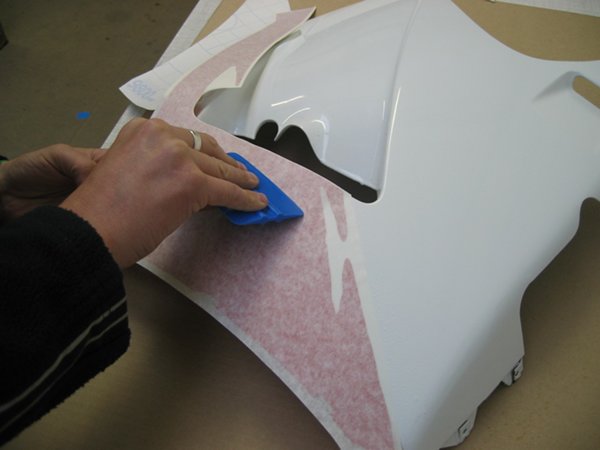
Peel back the backing paper from the part of the sticker where you intend to start, but leave the rest in place as this will prevent the decal sticking until you are ready for it. Carefully re-align the sticker with the edge of the panel, remembering how much space to leave at the edge from your dry run. Carefully press down the decal at the edge to hold it in place. |
 |
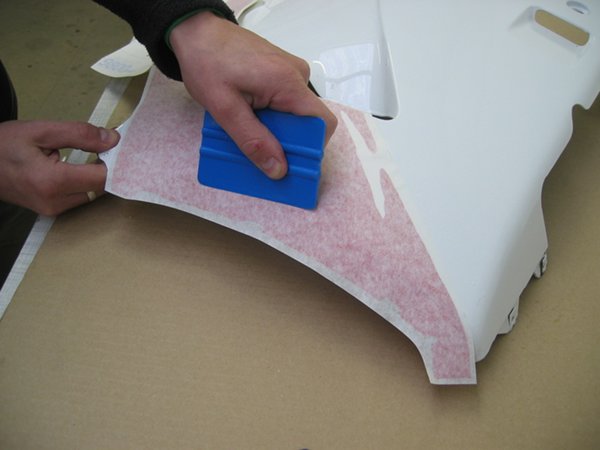
Using a flexible squeegee and firm pressure, work your way systematically and progressively along the decal, don't just rub randomly over the surface, this will cause air bubbles. Notice how the unfitted part of the decal is held slightly off the panel until it is pressed down with the squeegee. |
 |
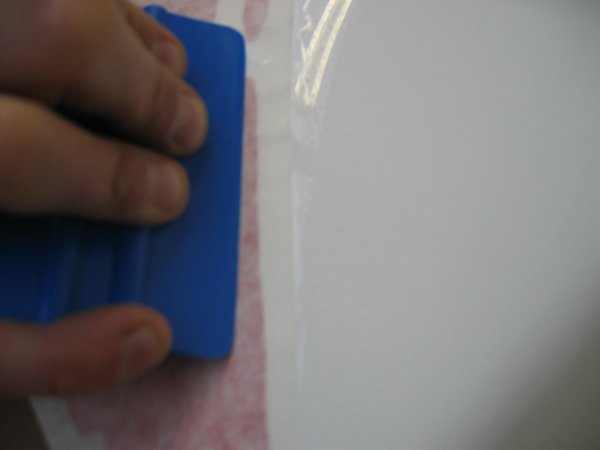
Continue along the decal in the same manner, peeling the backing away as you go, but leaving as little adhesive exposed as possible. This will help prevent dust particles sneaking in uninvited and spoiling the job. |
 |
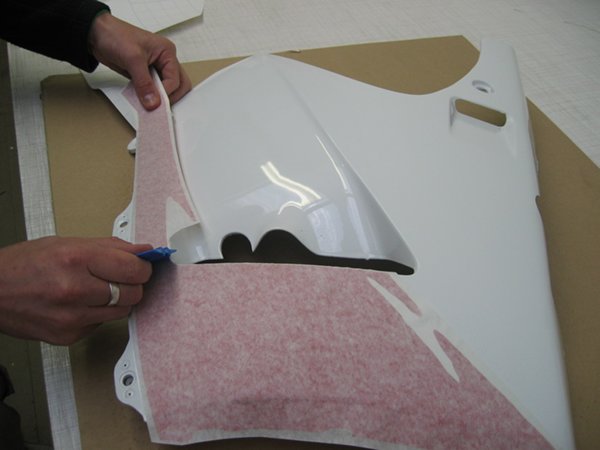
Once you have fitted the whole decal, peel the application tape off the front. Peel it back flat across the panel, not upwards. This will enable you to see if any or the edges or corners are not stuck down properly and also reduce the chance of tearing the decal off the panel. Remember that the adhesive on stickers is just like any other glue, and takes time to get maximum adhesion. If you have any bubbles, refer to lesson 6. |
This lesson will illustrate a good method for fitting large decals to fairing panels with air vents, mounting holes and across panels joints. We generally supply large decals complete, by that I mean we do not pre-cut the vents or mounting holes into the decals. The reason for this is it allows a bit more leeway when fitting. If the holes are all pre-cut into motorcycle stickers it means you have to be millimetre perfect when fitting, and even for a pro this can be difficult. I have used an HM Plant sticker being fitted to a Fireblade for this example but this method is also used when fitting other decals like Xerox Ducati or the Virgin Yamaha.
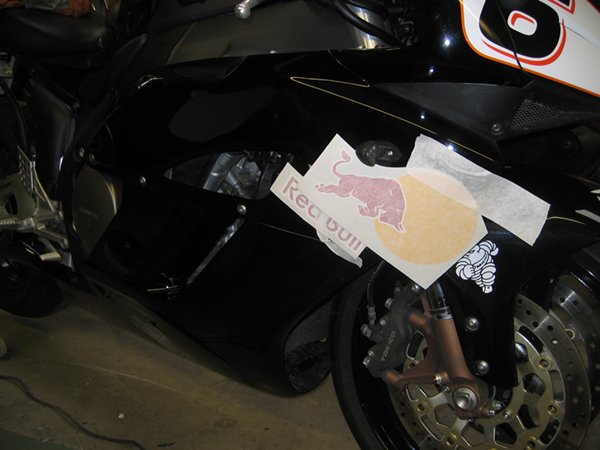 |
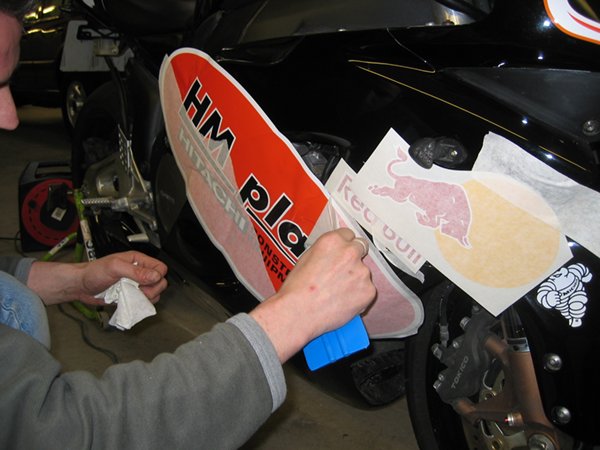
As always, plan ahead. Tape the smaller decals into their approximate positions. |
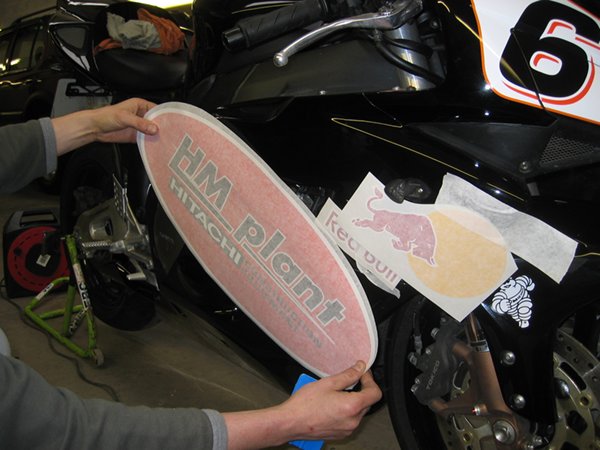 |
Perform a dry run to plan your tactics and get a clear picture in your mind or what the decal will look like when fitted. |
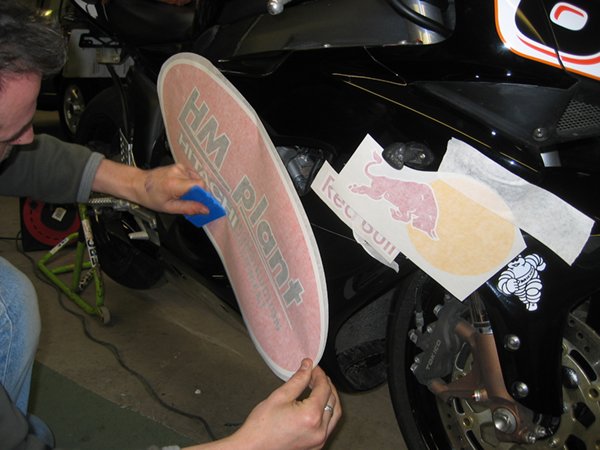 |
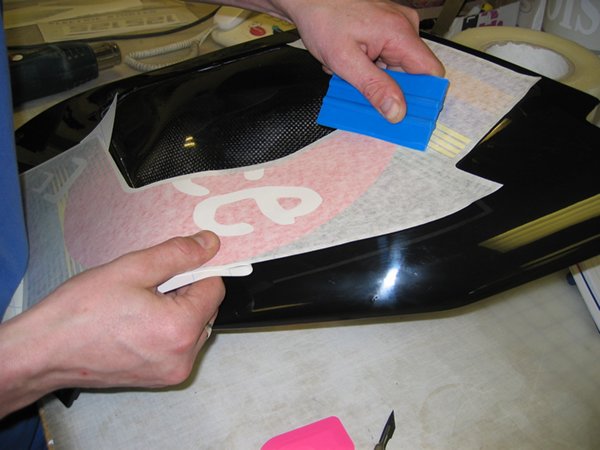
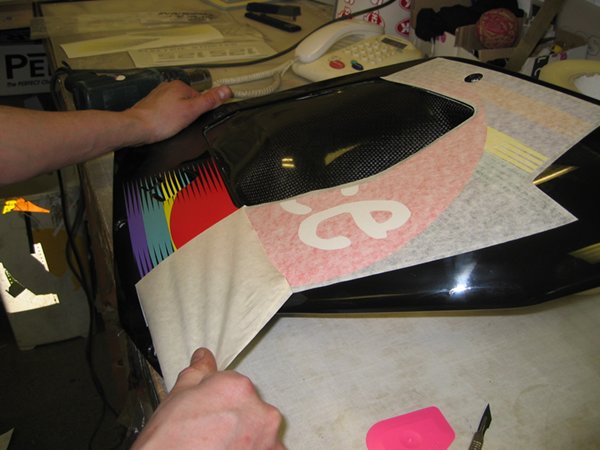
Remove the backing paper from the whole decal and using a flexible squeegee apply the decal to the flat surfaces, working around any vents or tight corners. Leave the sticker to hang loose over the edges and vents. |
 |
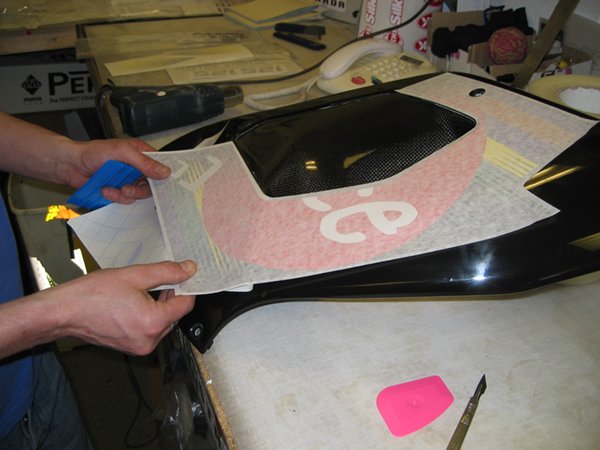
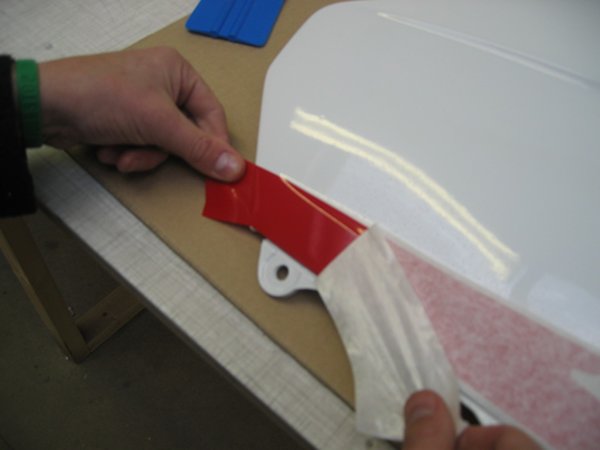
Carefully peel the application tape away from the sticker, making sure not to tear the decal. |
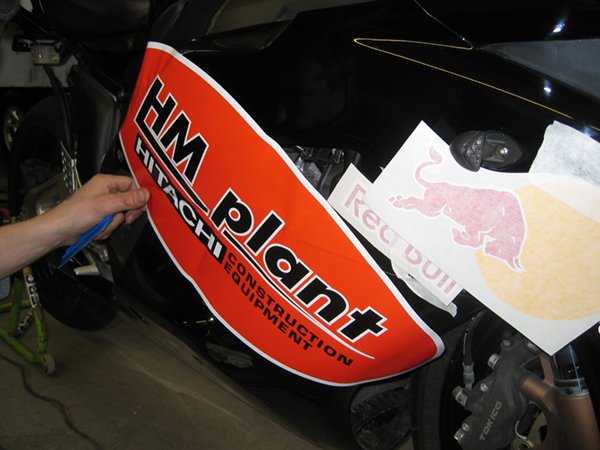 |
You should now have something that looks like this. The bulk of the decal is fitted and the vinyl just hangs over everything else. |
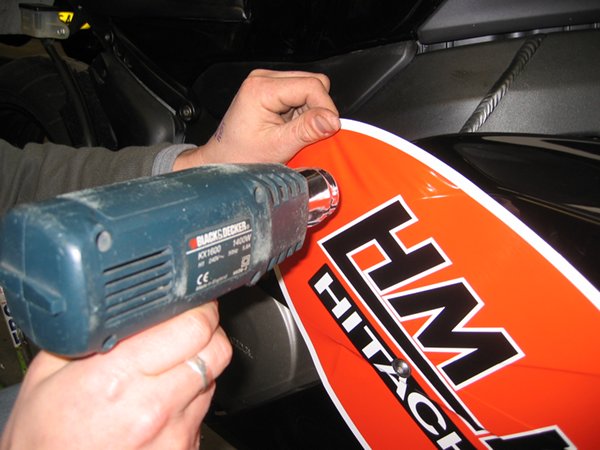 |
To aid flexibility, use a small amount of heat, this will allow the vinyl to curve around tighter bends. It can also be used to remove any slight creasing in the vinyl before you squeegee it down. |
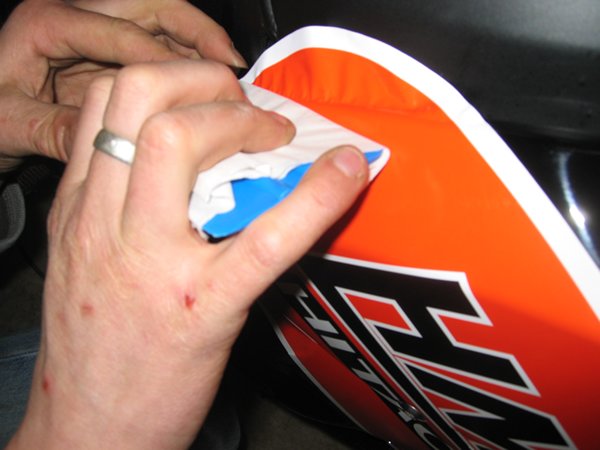 |
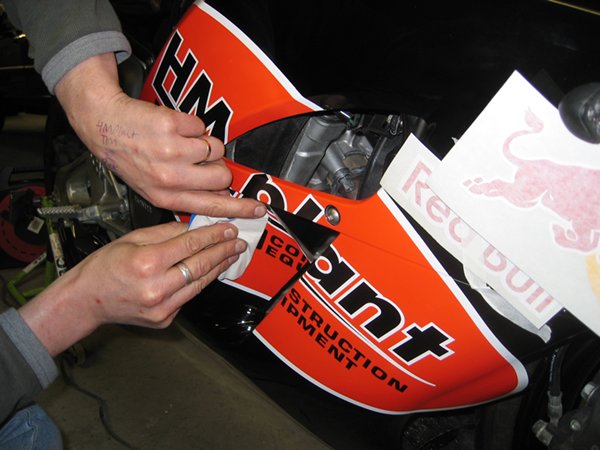
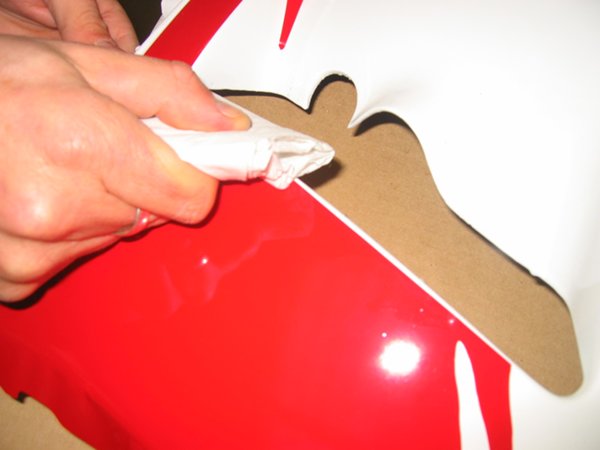
Take great care when working on the unprotected decal, it is a good idea to wrap a piece of soft cloth, or kitchen paper around the squeegee. |
 |
Using the scalpel, trim carefully around the mounting screws, this is done by putting the tip of the blade though the vinyl, into the hole and following the recess round. Not by cutting through the vinyl pressing against the paintwork. |
 |
Like this ! |
 |
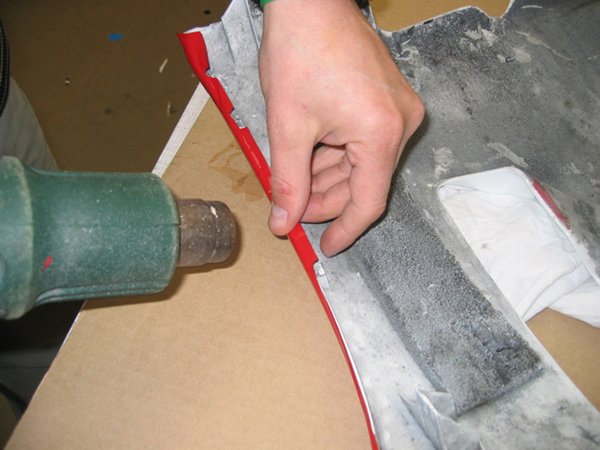
Run the blade along the join between the panels, and push the vinyl into the gap with the edge of the squeegee. |
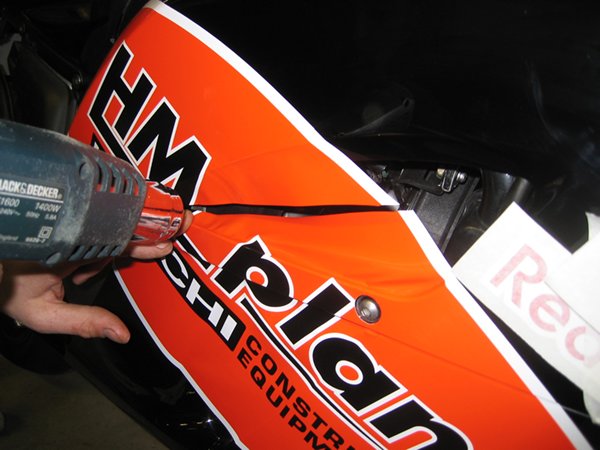 |
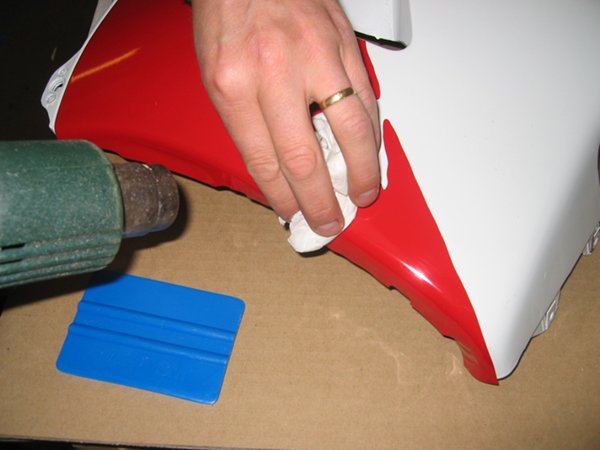
Run the blade along the mid line of the vent and using a little heat, (if it's only shallow, the heat from your finger is normally enough) work the vinyl progressively into the vent trimming off the excess as you go. |
 |
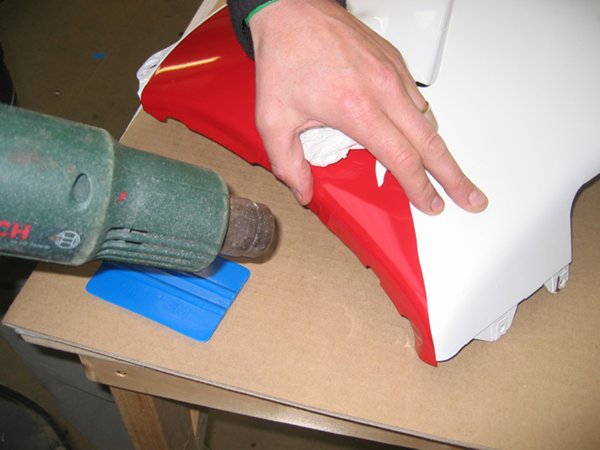
Repeat the above steps with all remaining vents and bumps |
 |
Using your fingers work the vinyl around the from edge and trim of along the the inside edge. If you have any bubbles, refer to lesson 6. |
OK, so you've mastered the basics, you've sussed how to fit big stickers and you can trim vinyl on the bike without damaging the paintwork? In that case it's time for the "biggie", the "this is as hard as it gets" bit, the bit where people will say "that's vinyl? you're kidding, it looks like it's been painted"
This method is used for a number of our more comprehensive kits. Bikes like the Xerox and Fila Ducati's, The Alice Aprilia and the Vimto Joey Dunlop SP-1. And the key to fitting it is the 6 P's rule..... Prior Preparation Prevents Pi$$ Poor Performance. I will show a couple of examples here, the Xerox belly pan (same method as Fila) and the Vimto seat unit The Vimto seat unit is pretty much as hard as it gets. If you can fit this, you can fit anything.....almost.
 |
Make sure your work area is as dust free as
possible, as when removing the backing from a large sheet of vinyl
generates a lot of static, and it will "suck up" all the fluff and dust
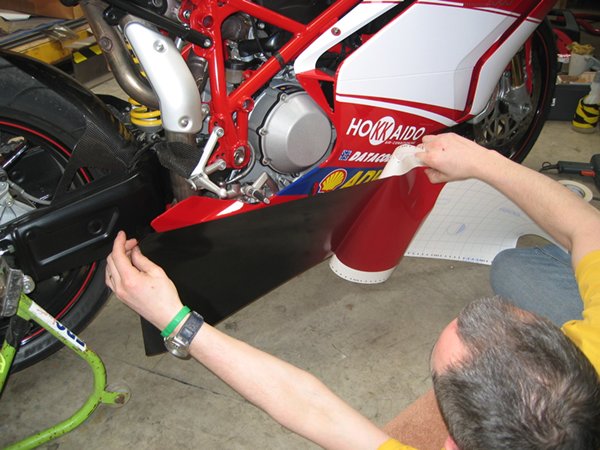
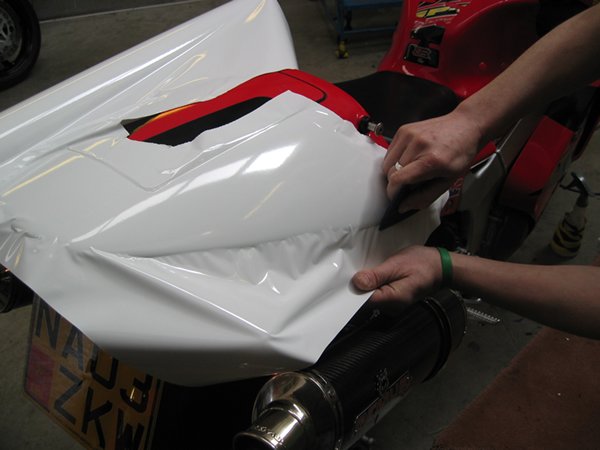
from the area as if you've just opened a black hole! Peel off about half the backing paper and offer the vinyl up to the belly pan, making sure you will have enough to cover all the bellypan, with no gaps. |
 |
Apply the vinyl to the end of the panel with your thumb, again checking you are lined up correctly to ensure no gaps at the top edge, if you get half way along and discover you were out of line, it's too late and you'll be giving us a call asking for another bit! |
 |
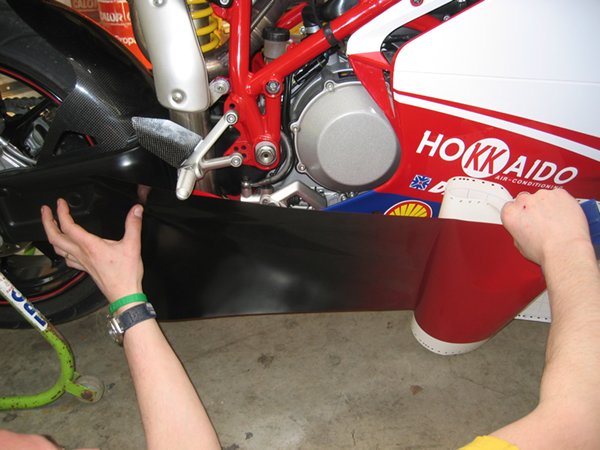
Work your way along the flat section of the panel with a soft squeegee (a 3m blue with a bit of soft cloth wrapped around will do) ignoring the recesses and holes etc. as in the previous lesson. |
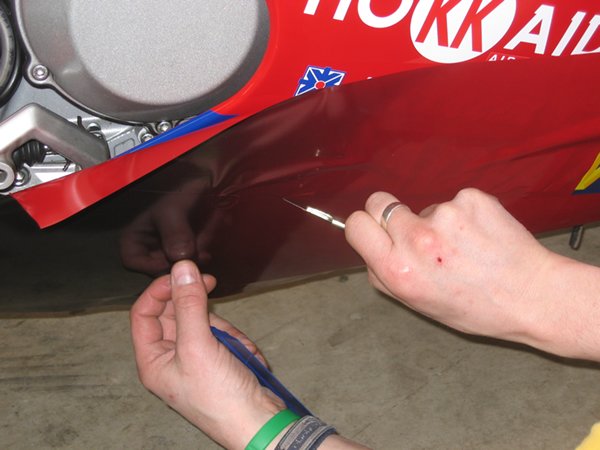 |
Once the vinyl is fitted, run your finger along the line where it
overlaps the other decals. This will make the edge easy to see.
Now, carefully score the vinyl with a BRAND NEW blade. (using a new
blade means you don't need to press on and therefore wont mark the paint
below) Carefully peel off the excess vinyl, making sure you don't remove the other sticker at the same time. |
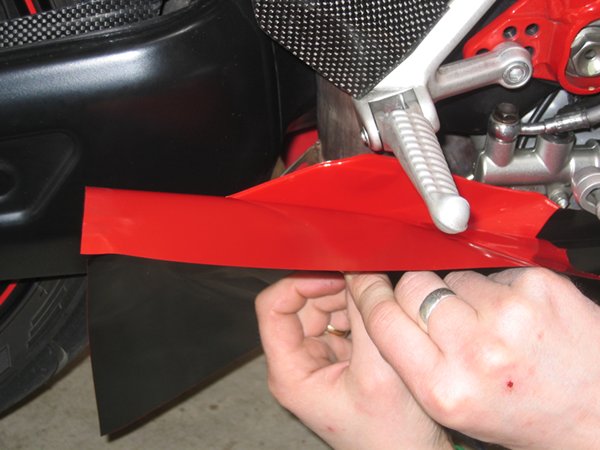 |
Now you can go back to the recessed parts and work on them. On the 999 it is necessary to make a cut and join in order to get the vinyl to drop into the section under the footpeg without creasing. |
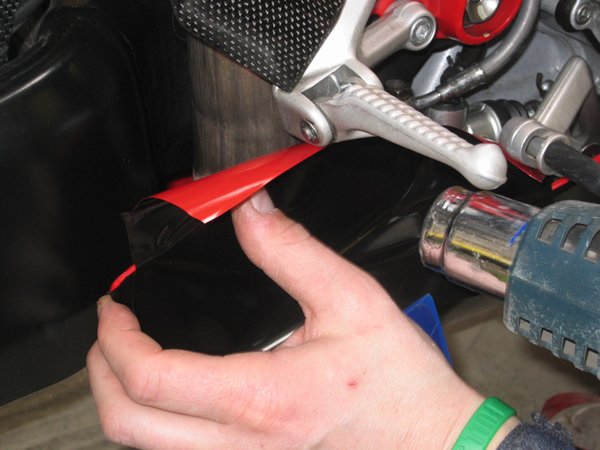 |
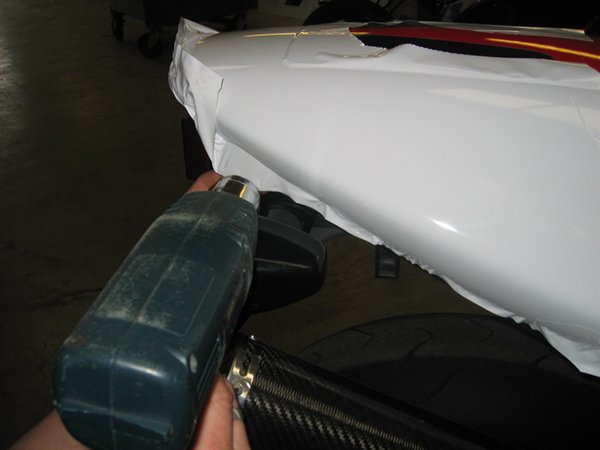
A bit of carefully applied heat will help you stretch the vinyl into place. If you get a crease, you can remove it by carefully pulling the creased part of the decal back off the panel and giving it a quick blast of heat and it will magically shrink back to a flat bit of vinyl. |
 |
Trim around the edge of the panel, again making sure you only score the
vinyl, not the paint below.
Job Done !! |
The Vimto Demon Joey Dunlop VTR SP-1seat unit
 |
Cut a piece of vinyl big enough to do the job, you'll feel a right pr@t if you finish one side perfectly only to discover you don't have enough vinyl left for the other side. Again the 6 P's apply. |
 |
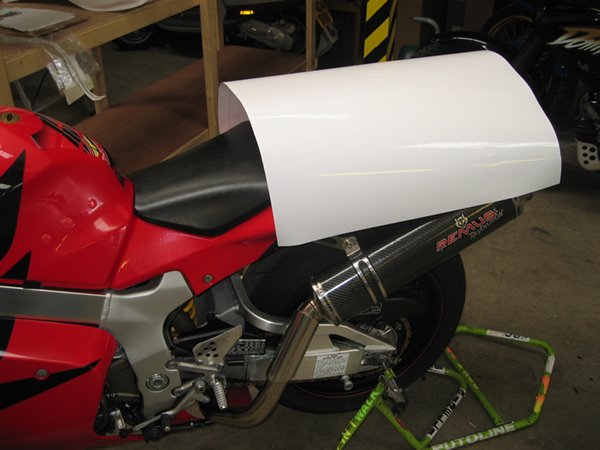
Starting at the back, and roughly cutting to shape as you go, squeegee the big flat bits first, leaving the curved bottom edge for later. |
 |
Pull the vinyl vertically downwards and squeegee as far down as you can BEFORE the vinyl starts to crease. |
 |
Using the hot air gun, gently warm the vinyl and squeegee as far down the panel as you can. The further you can get it down, the easier it will be when it comes to trimming it to shape. |
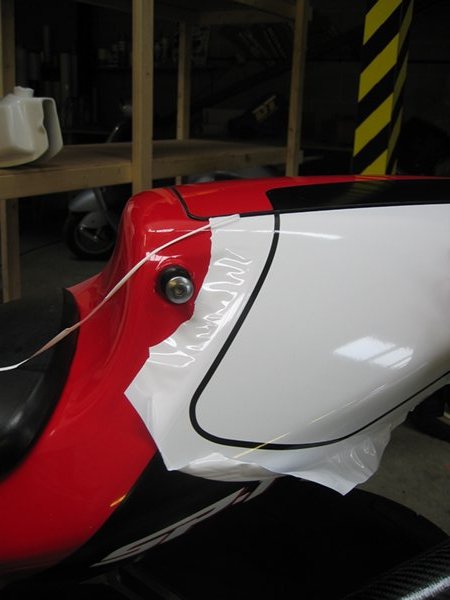 |
Using fine line tape mark out the shape of the number board. Remember to allow for a black pin stripe around the front edge. |
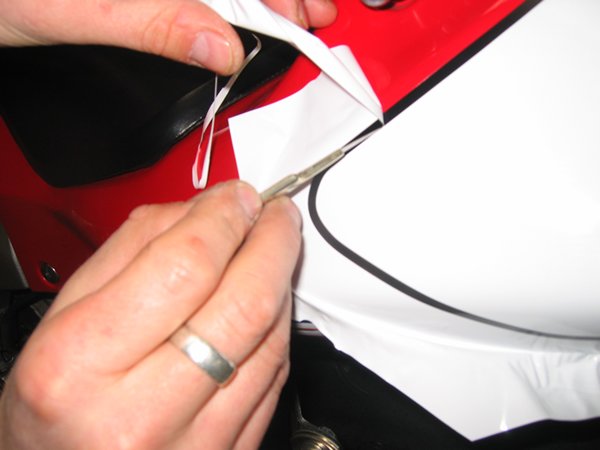 |
Carefully score the vinyl along the pin line and remove the excess. |
 |
The finished number board. If you get this far and it looks like the one on the left, you are a sticker fitting god and have truly mastered your art.! |
This is probably the method of fitting decals for which there are more myths, misconceptions and absolutely ridiculous stories told. I've heard of people soaking the decals in buckets of water, using neat washing up liquid, turps, and all manner of other liquids. All these methods will destroy your decals faster than dropping them in a shredder. There is only one solution we use at The Image Works and it's the cheapest, simplest, most abundant fluid on the planet. All you need is water, a garden sprayer and 2 drops of washing up liquid. The water will allow you more time to position the decals and make the fitting of large decals onto reasonably flat panels easier. The washing up liquid is only needed as it will break up the surface tension of the water, so that when you spray the water onto the panel you will get a fine mist of tiny water droplets. If neat water is used, large drops form which will run off the panel. The wet method is not suitable for all applications as it reduces the short term effect of the adhesive, making fitting decals to panels with a compound curve very difficult. It is also not suitable for fitting cut text decals as when removing the application tape it is very easy to tear the vinyl if part of the text has not yet adhered to the panel.
The most important thing to remember when using the wet method is be patient and take your time. This method cannot be rushed and it will take much longer to complete that fitting a dry decal. So with the scene set we can continue with lesson 4
 |
Fill your sprayer with clean water and add just TWO DROPS of washing up liquid. Wipe down the panel to remove any dust then spray the solution onto the area where the decal is to fit. |
 |
The panel should now look like this, with a nice even coat of water drops. |
 |
Peel the backing from the largest part of the decal and lay in onto the panel. |
 |
You will be able to lift and reposition the decal. If you find it is trying to stick, carefully pull it away and apply more water. |
 |
Starting in the middle of the largest part of the decal, squeegee the water out towards the edges. Don't worry about trying to get the decal to stick around the corners or into vents at this stage. Just concentrate on getting the big flat part fitted in the correct place. |
 |
As you squeegee the water to the edges it is a good plan to blot up the excess water as it runs out from the decal. If you don't it can sometimes be drawn back under the vinyl as you lift the squeegee making the whole process take much longer than it needs to. |
 |
Work up to the edge but leave the curved parts. We'll come back to them later..... much later. |
 |
With the big bit done we can move on to the smaller areas. If necessary lift the decal and apply more water. Then squeegee out the water as before. Be systematic and work along the decal steadily until all the water is out from underneath the flat parts. |
 |
With all the flat sections completed, your decal should look something like this. Now for the most important bit..... Go and have a cup of tea and leave the panel to dry a little. |
 |
Once the tea is out of the way. Carefully peel the application tape away from the decal. Be VERY careful that you don't pull the decal off again. Remember the reason we are using water is to slow down the adhesive so it may not be fully stuck yet. |
 |
With all the tape off, the remaining vinyl will be much easier to curve |
 |
Wrap some kitchen paper around your squeegee and go around the edges of the decal squeezing out any remaining water. The paper towel will absorb the water as it is expelled thus preventing it being drawn back under the vinyl. |
 |
Now it's time to go back to those curved bits and vents. Using a hot air gun and a wad of kitchen roll, apply a little heat to the vinyl and slowly but firmly work the decal around the edge. As always, when using the hot air gun, keep your hand near the area you are heating, this will stop you melting the decal. If its getting to hot to keep your hand there, you're getting it too hot !!! |
 |
Work along the whole length of the decal at once, don't try to do one bit then move along a bit. Working along the whole length will spread out the stretching of the vinyl and prevent creasing. If you try to start at one end and work to the other, you will find when you get there you have a lot of vinyl left and no where to stick it. |
 |
If
the decal you are using wraps around the inside edge, use a little more
heat and work the decal around with your thumb, again working the whole
length. Put the panel somewhere warm to finish drying out. The adhesive will need at least 12 hours to adhere properly. If you plan to lacquer over the finished panel I would suggest leaving it at least 24 hours to dry before lacquering. |
Removing Bubbles and minor creases
If you've followed all the lessons above carefully, then hopefully you won't need this section. But hey, we all get the odd bubble or small crease. This section will arm you with the secret of invisible bubble removal, and it does not involve using a pin or needle (this is yet another myth that will result in ruined stickers) The tools needed are the scalpel, a brand new blade, a finger and for crease removal, a hot air gun. Now obviously we always get it right first time (yeah right) so rather than demonstrate on a customers bike we will use "The Image Works Cock-up simulator" which at first glance may look like a bit of scrap plastic. (you'd be surprised how difficult it is to deliberately get a bubble)
| Bubble Removal | |
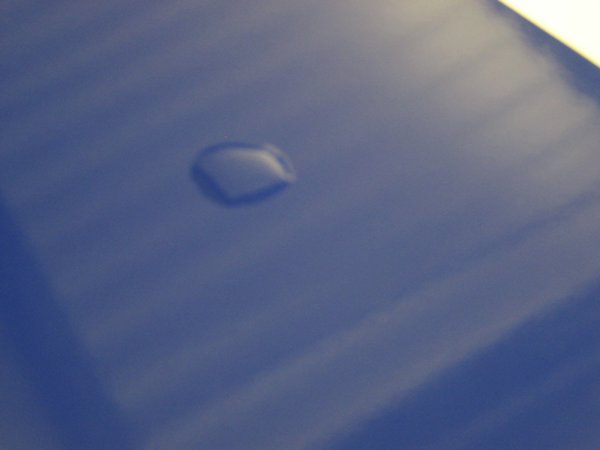 |
Here we have the classic bubble. The method of bubble removal is exactly the same for large or small bubbles, whether full of air or water. |
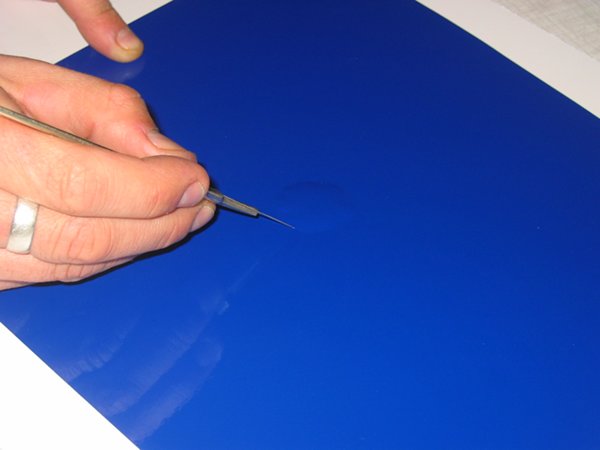 |
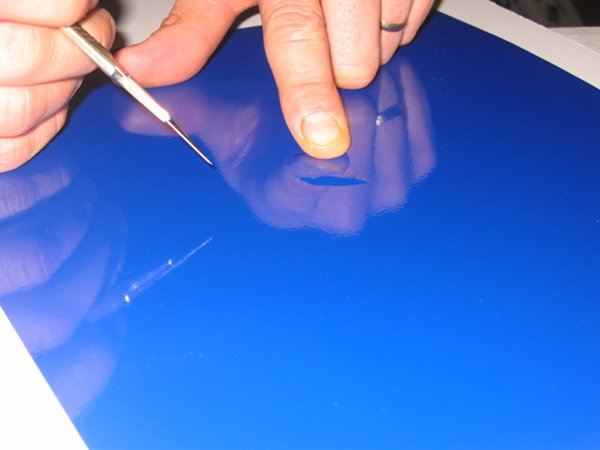
Using a brand new blade (not a pin or needle, these are nowhere near shape enough to do a neat job), make a cut about half a millimetre long next to the bubble, not in the bubble itself. |
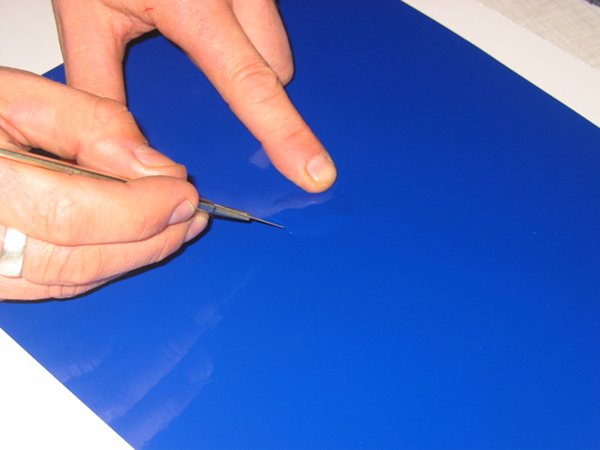 |
Using your finger (or a squeegee) slowly push the bubble towards the cut |
 |
If it's a particularly big bubble, you may need to make a second cut on the other side too. |
 |
Once you've pushed all the air/water out through the cut, rub over it with your finger. And there you have it...... or rather now you don't have it ! |
| Crease Removal | |
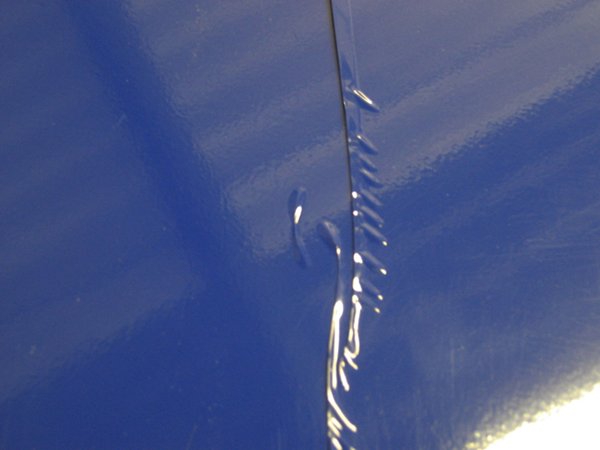 |
Now that is what I call a crease. At this point most people would swear, rip the sticker off, throw the panel across the room, kick the dog and storm off to the pub (not a bad plan, but it won't fix your decal). But if you're careful, don't panic and follow this method you will be able to rescue pretty much anything so long as you didn't tear it or scratch the printing. |
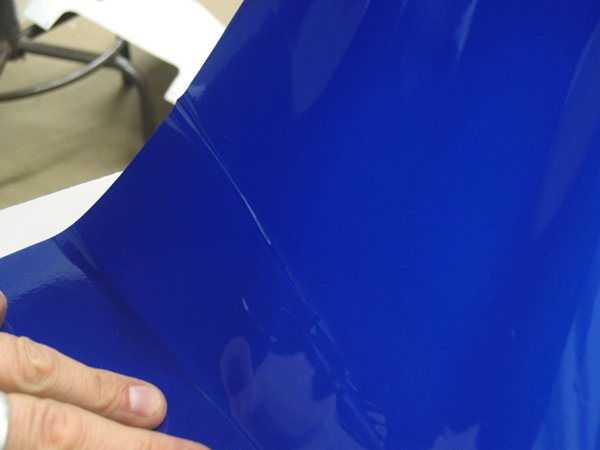 |
Carefully pull the decal away from the panel, until the creased part is lifted off the panel |
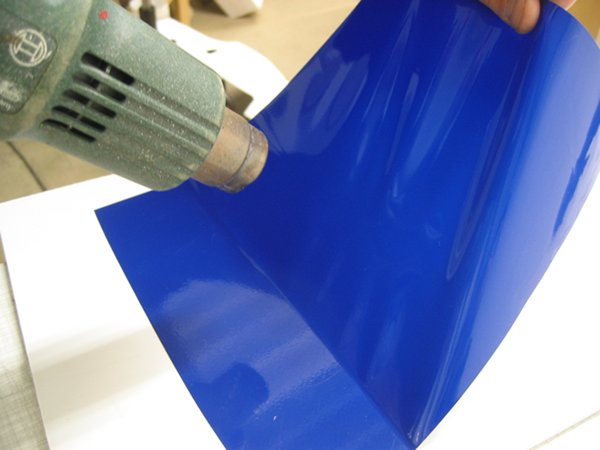 |
Gently warm the vinyl. As the vinyl gets warm, it will magically return to it's original, flat self |
 |
Carefully re-apply the decal, being a bit more careful this time ! |